If you’re wondering, How do I remove the background in CapCut?, you’re in the right place. CapCut, a popular video editing app, makes it easy to remove backgrounds from your videos or images, giving your content a polished, professional look. Whether you’re creating a TikTok clip, a YouTube video, or a fun personal project, this feature is a game-changer. In this article, we’ll walk you through the process step-by-step so you can master it in no time.
Why Remove the Background in CapCut?
Before diving into the “how,” let’s talk about the “why.” Removing a background helps you focus on the main subject, replace distracting scenery with something more appealing, or even create a transparent effect for overlays. CapCut’s background removal tool, powered by AI, simplifies this task for beginners and pros alike. So, How do I remove the background in CapCut? Let’s get started.
Step 1: Open CapCut and Start a New Project
First, download and open the CapCut app on your phone or desktop (it’s available for iOS, Android, and PC). Tap “New Project” on the mobile app or “Create” on the desktop version. Import the video or image you want to edit by selecting it from your gallery or device storage.
Step 2: Access the Background Removal Tool
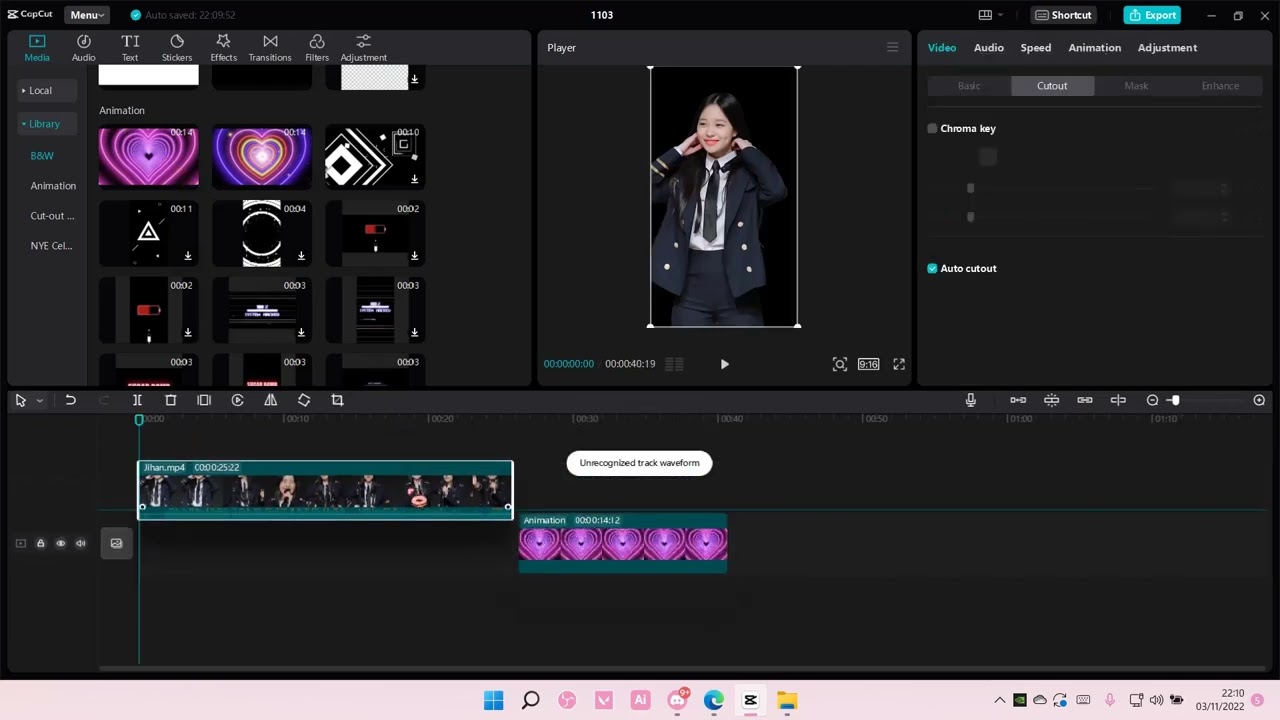
Once your media is loaded, here’s where the magic happens. On the mobile app, tap the video or image in the timeline, then look for the “Edit” or “Cutout” option in the toolbar. Select “Remove Background.” On the desktop version, go to the right-hand editing panel and click “Remove BG.” This answers the question, How do I remove the background in CapCut?—it’s just a few clicks away!
Step 3: Choose Your Removal Method
CapCut offers multiple ways to remove backgrounds:
- Auto Removal: The AI automatically detects and removes the background, ideal for simple scenes with clear subjects.
- Custom Removal: Use the brush tool to manually paint over areas you want to keep or erase for more control.
- Chroma Key: Perfect for green screen videos—select the color to remove.
Pick the method that suits your project. For most users asking, How do I remove the background in CapCut?, the auto removal option is the quickest way to start.
Step 4: Fine-Tune and Adjust
After the background is removed, check the result. If the AI misses spots or cuts out too much, use the “Smart Brush” or “Eraser” tools to refine edges. This step ensures your video or image looks seamless.
Step 5: Export Your Work
Satisfied with the result? Tap the export icon (an upward arrow) on mobile or “Export” on desktop. Choose your resolution and format, then save or share directly to platforms like TikTok or Instagram. That’s it—you’ve answered How do I remove the background in CapCut? with a finished product!
Tips for Best Results
- Use high-contrast footage (e.g., a subject against a solid background) for cleaner auto removal.
- For complex scenes, combine auto and manual tools.
- Test on short clips first to get the hang of it.
Conclusion
Now you know How do I remove the background in CapCut? It’s a simple yet powerful feature that elevates your editing game. Whether you’re swapping backgrounds, creating overlays, or just cleaning up a shot, CapCut makes it accessible and free. Try it out today and transform your videos with ease! Backscreen