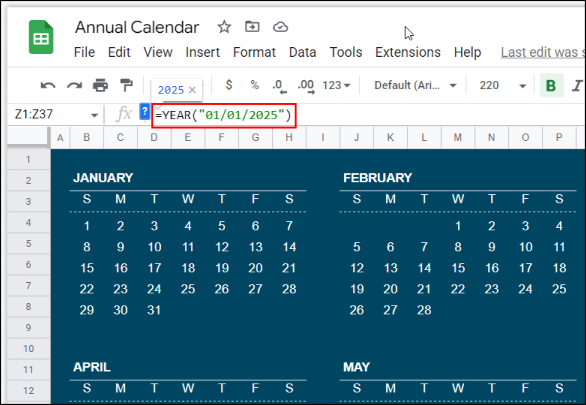
Creating a calendar in Google Sheets is a practical way to organize your schedule, whether for personal use, work, or education. You can either use pre-made templates or build one from scratch with the help of formulas and functions. This flexibility makes it an excellent tool for teachers crafting timetables, professionals managing deadlines, or anyone needing a custom planner. Similar to creating schedules in Excel, Google Sheets offers a straightforward process with built-in options to simplify the task. In this guide, we’ll explore three methods to create a calendar in Google Sheets: using built-in templates, third-party templates, and a DIY approach.

Method 1: Using Built-in Google Sheets Templates
Step 1: Access the Template Gallery
Open Google Sheets and, from the homepage, click Template Gallery at the top.
Screenshot Tip: Look for “Template Gallery” near the top of the interface.
Step 2: Choose a Calendar Template
In the gallery, scroll to find the Calendar section. Google Sheets offers various pre-designed templates—select the one that suits your needs by clicking it.
Step 3: Customize Your Calendar
The selected template will open in a new sheet. From here, tweak it to your liking—edit dates, colors, or text using the built-in customization options.
Result: ou’ll have a ready-to-use calendar tailored to your preferences in minutes.
Method 2: Using Third-Party Calendar Templates
If Googl’s built-in options don’t meet your needs, third-party templates provide more variety. Here are three trusted sources:
1. Vertex42 Calendar Templates
- Website: https://www.vertex42.com/calendars/
- Process: Visit Vertex42 and browse their calendar templates. Look for those marked with “GS” (Google Sheets-compatible). Click your chosen template, select the Google Sheets version, and hit Get the Template to add it to your Drive.
2. Spreadsheet Class Templates
- Website: https://www.spreadsheetclass.com/google-sheets-calendar-templates/
- Process: Access the link, find a template you like, and click the provided download link to import it into Google Sheets.
3. Smartsheet Templates
- Website: https://www.smartsheet.com/free-google-calendar-templates
- Process: Go to Smartsheet, pick a calendar template, and download it to your Google Sheets account.
Benefit: These sources offer professionally designed templates, often with extra features like event tracking or annual layouts.
Method 3: Creating a Calendar from Scratch in Google Sheets
For full control, build your own calendar manually. Here’s how:
Step 1: Set Up the First Week
- In a new Google Sheets file, enter the days of the week (e.g., Monday to Sunday) across the top row (A1:G1).
- Below, input the first date of the month (e.g., “1” for the 1st). If it falls mid-week, fill in the preceding days of that week, then add the first two dates of the next week below.
Step 2: Fill in the Weeks
- Highlight the first two dates of the second week (e.g., cells A2:B2), then drag the fill handle right to autofill the rest of the week.
- Leave a blank row between weeks for clarity. Repeat this process for subsequent weeks, filling two starting dates and dragging to complete each row.
Screenshot Tip: Drag the blue square in the bottom-right corner of the highlighted cells.
Step 3: Adjust Empty Rows
- Identify blank rows in your calendar layout. Hold Ctrl (or Cmd on Mac) and click each empty row’s number on the left.
- Drag the row border downward to resize these rows, creating space for notes or events.
Step 4: Customize the Design
- Highlight date cells and apply colors (e.g., blue for headers). Adjust font styles or sizes via the toolbar.
- Add event notes below each date, mimicking a wall calendar’s layout.
Visual Result: A clean, functional calendar emerges, ready for your personal touch.
Step 5: Duplicate for Additional Months
- Click the sheet tab at the bottom and select Duplicate to create a copy.
- Adjust the dates in the new sheet (e.g., start with “1” for the next month), drag to autofill, and update events as needed. The formatting stays intact.
Why Create a Calendar in Google Sheets?
- Flexibility: Customize layouts, colors, and data to fit your needs.
- Accessibility: Access and edit from anywhere with an internet connection.
- Collaboration: Share with colleagues or students for group planning, like timetables for teachers.
Conclusion
Whether you opt for Google Sheets’ built-in templates, third-party designs from Vertex42 or Smartsheet, or a hands-on DIY approach, creating a calendar in Google Sheets is both simple and versatile. Each method caters to different preferences—quick setups for beginners or full customization for advanced users. Perfect for work schedules, school timetables, or personal planners, this tool empowers you to stay organized effortlessly. Give it a try today and craft a calendar that works for you!